• Skip to primary navigation
  • Skip to main content
  • Skip to primary sidebar

The Crispy Cook

  • Home
  • Recipes
  • Appetizers
  • Desserts
  • About
  • Navigation Menu: Social Icons

    • Facebook
    • Instagram
    • Pinterest
    • Twitter

Marilyn

Vanilla Macaron Recipe

December 1, 2019 by Marilyn 1 Comment

Pink French Macarons tower

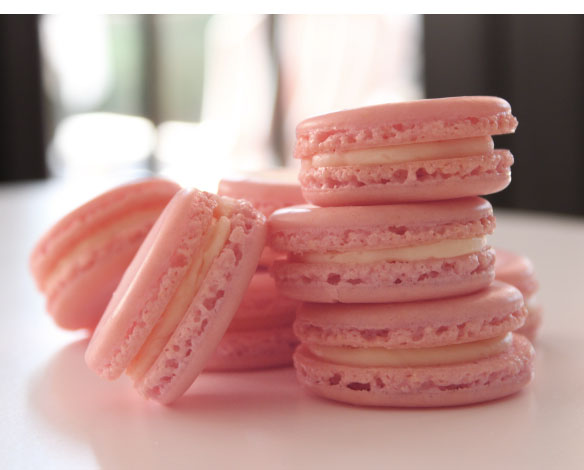
This vanilla macaron recipe is so simple, you’ll be able to make this delicious, yet notoriously difficult cookie in no time!

Ingredients

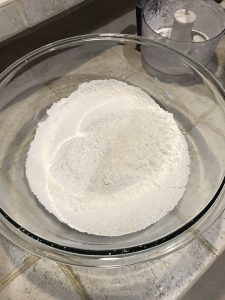
  • Powdered sugar and almond flour – The flour and the sugar need to be finely ground. I puree them in the food processor for about a minute until they look very fine and then sift the powder to make sure there are no large chunks or lumps.
  • Egg whites – I don’t age my egg whites, but I do make sure they’re room temperature.  Tip: If you want to bring your eggs to room temperature quickly, put the eggs in a small bowl filled with hot water for about 5 minutes.
  • Food coloring – Gel food coloring keeps the color from fading when you bake it.

How to make macarons

Almond flour and powdered sugar in food processorGround almond flour in food processor

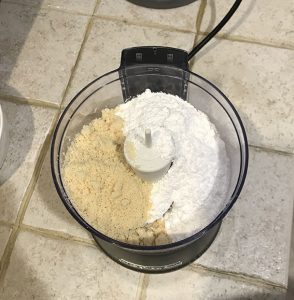
Combine the powdered sugar and almond flour in a food processor and process until very fine.  I like to use the puree button to make sure there are no big chunks of flour left.

Ground almond flour in sifterLeftover almond flour grounds in sifterAlmond flour and powdered sugar in bowl

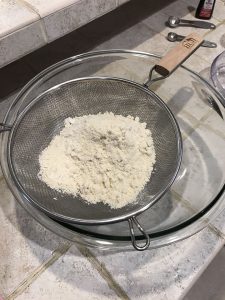
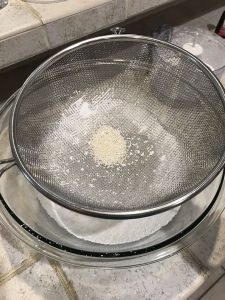
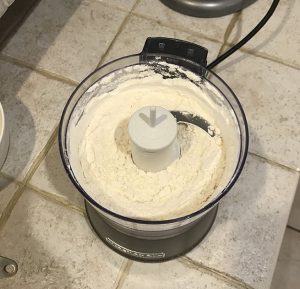
Sift the mixture to make sure you have no large flour chunks.  You can see here what was left in the sifter and the finely ground almond flour and powdered sugar.

The Meringue

Eggs in water inside white bowlMeringue in mixer

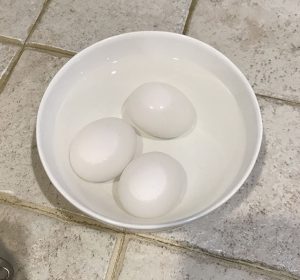
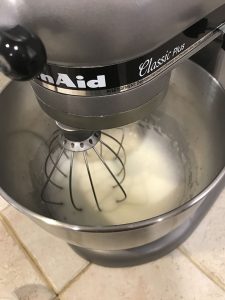
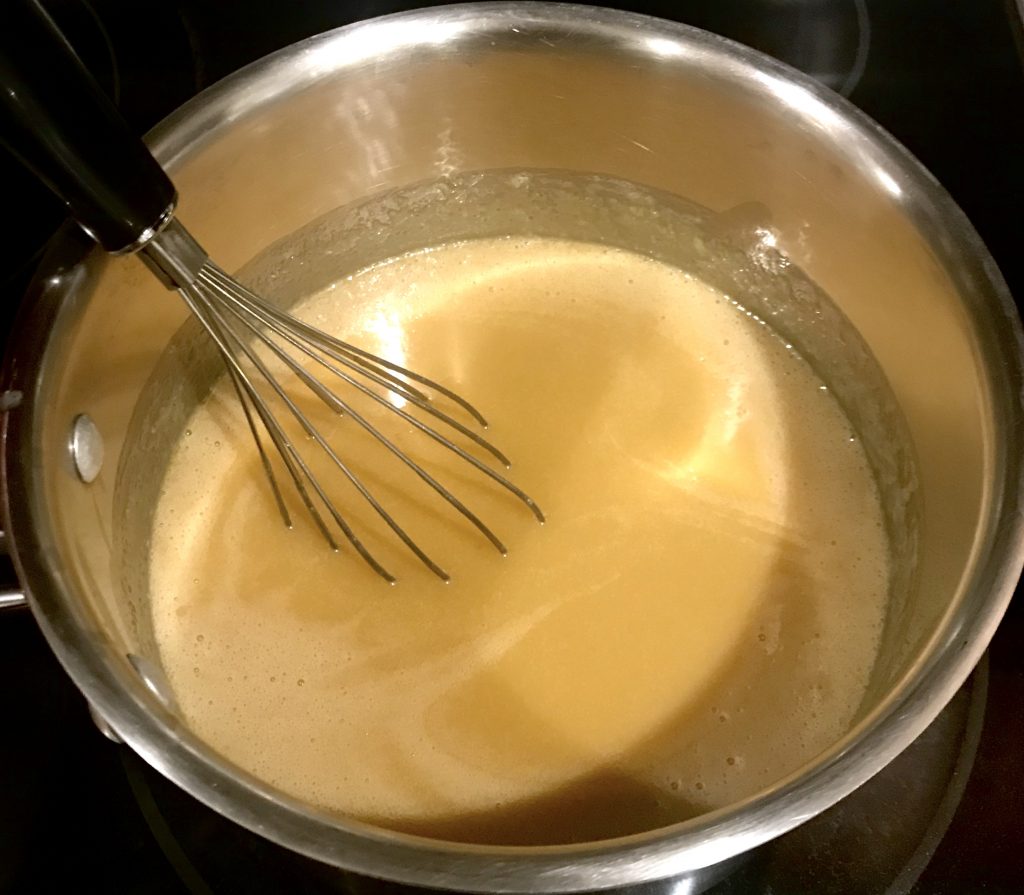
A quick way to get your eggs to room temperature is to put them in a bowl with hot water for a few minutes. Whisk the eggs and salt until the mixture turns frothy. Then slowly start adding the granulated sugar.

Meringue with soft peaks in mixing bowlMeringue with stiff peaks in mixing bowl

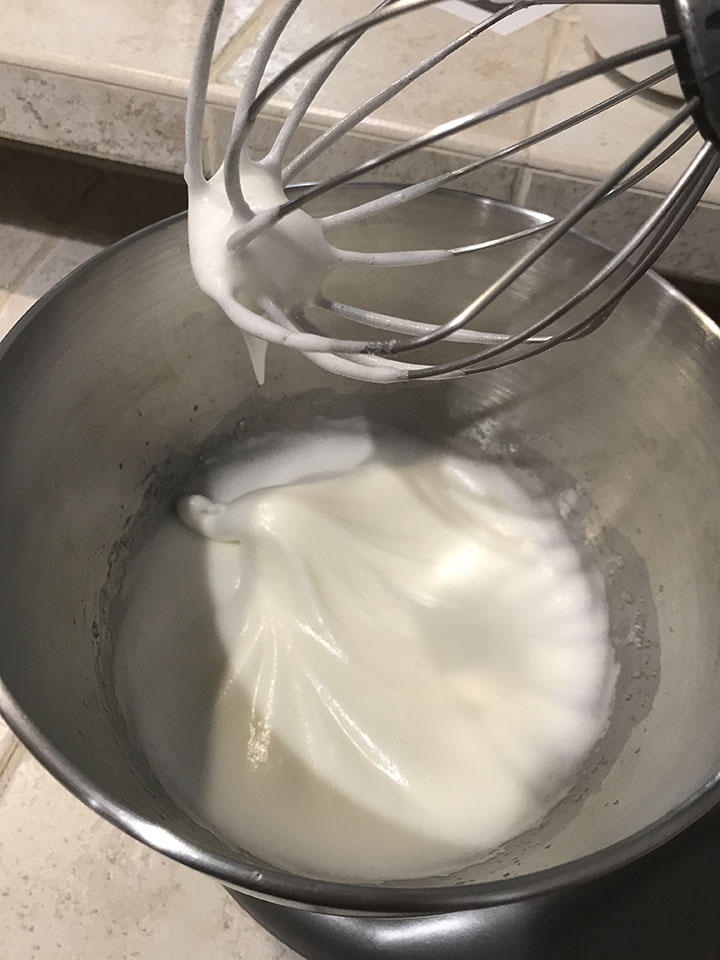
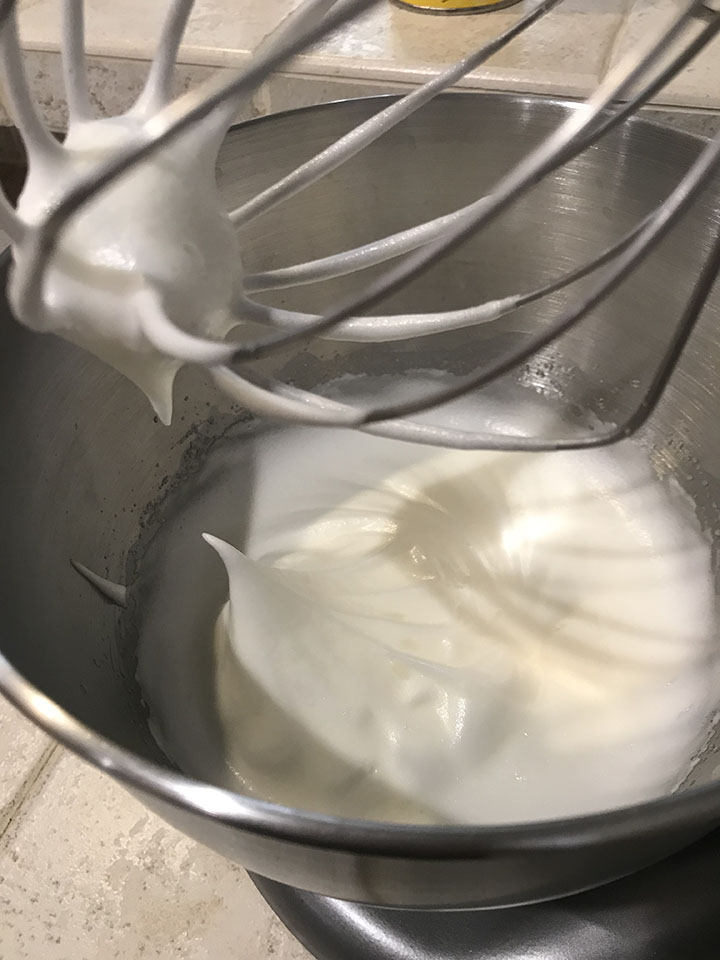
After you’ve added all the granulated sugar, keep whisking.  See how the peak on the left just fell to the side? Those peaks are still too soft.  The peak on the right is what you need at this point so it’s a good idea to stop whisking now, since you still need to add the coloring and vanilla.

Meringue with pink food coloring in mixing bowlPink meringue and almond flour in mixing bowl

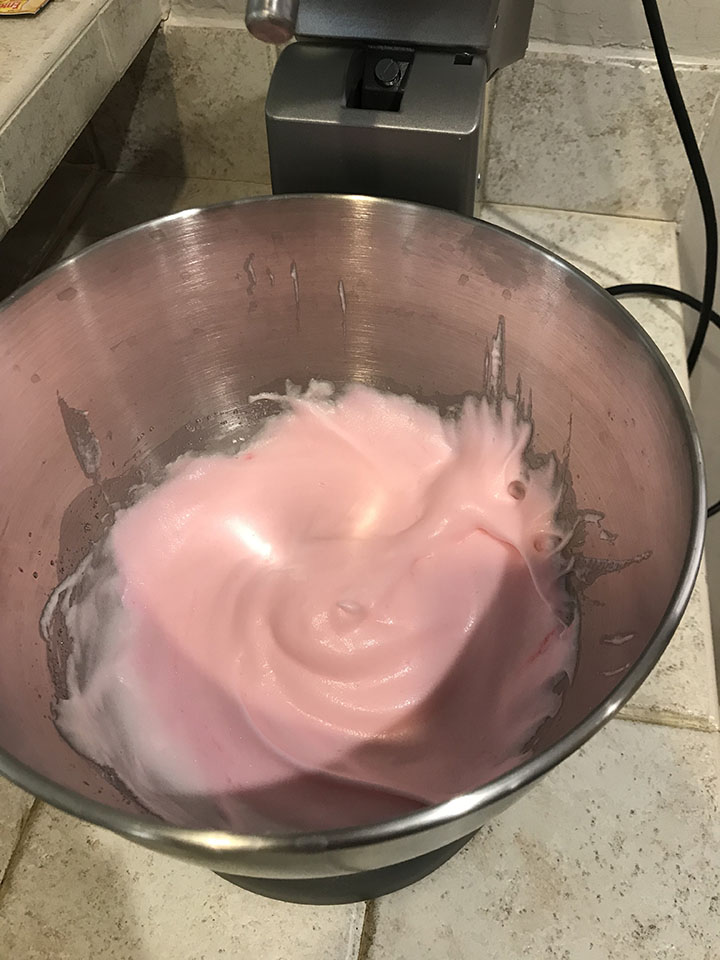
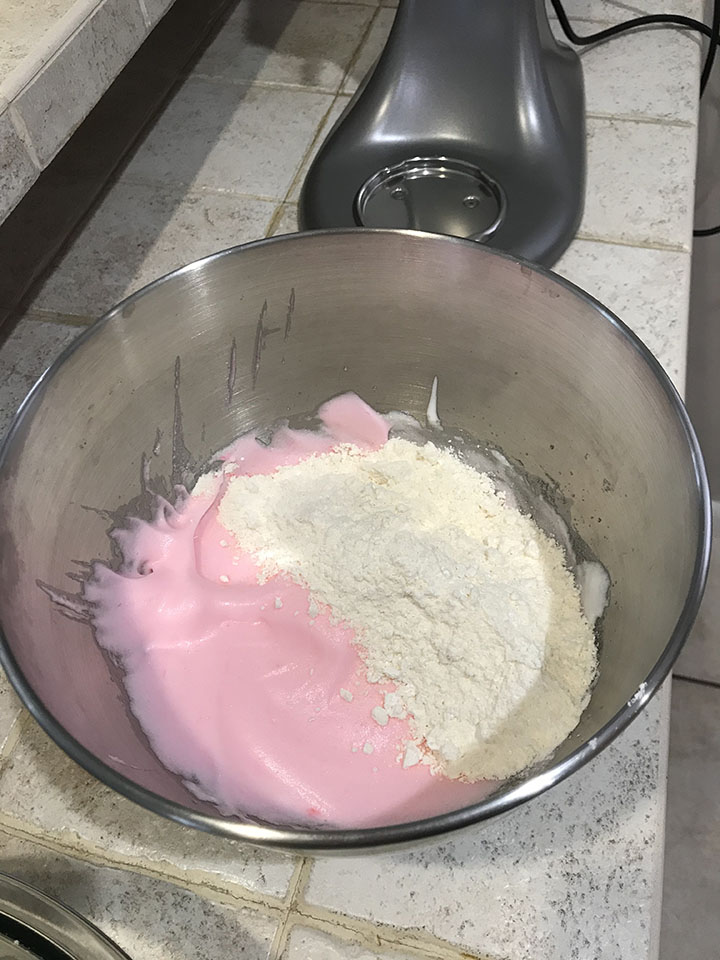
Add the vanilla and the gel coloring and whisk just enough to incorporate the color, making sure not to over mix.  Once your egg whites are the right consistency, you’ll be adding the flour mixture in three parts.

Start adding the flour and fold the mixture to incorporate the dry ingredients into the wet ingredients. Continue adding the flour and folding until all the flour has been added.

Pink macaron mix in mixing bowlPiping bag with pink macaron mix

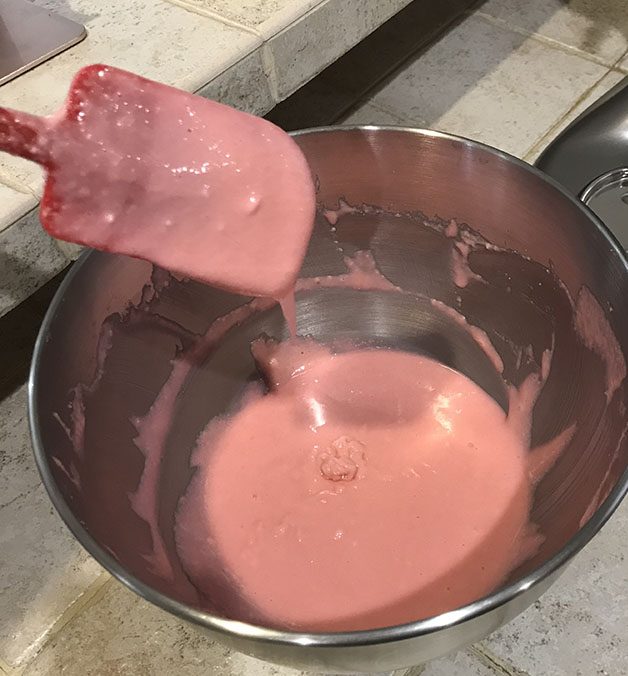
This is the consistency you’re aiming for.  Transfer the macaron batter into a piping bag with a medium round tip. (I couldn’t find the tip so I just free handed it, which I don’t recommend because my macarons were a bit misshapen… lesson learned!)

How to pipe macarons

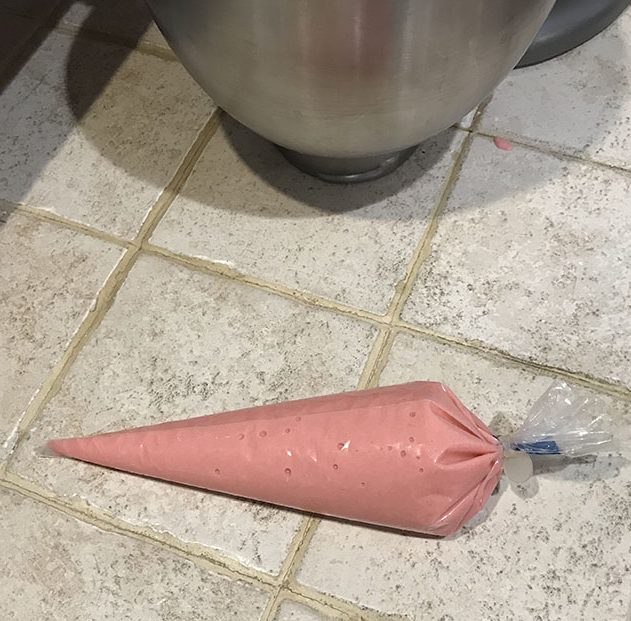
You’ll need a pastry bag (you can also use a ziploc bag, but they can be a bit flimsy, so I stick with a piping bag) and a medium round tip. Start in the middle and squeeze out just enough to make a 1-inch circle. The batter will flatten and spread so don’t squeeze out too much.

Pink macarons in baking sheet

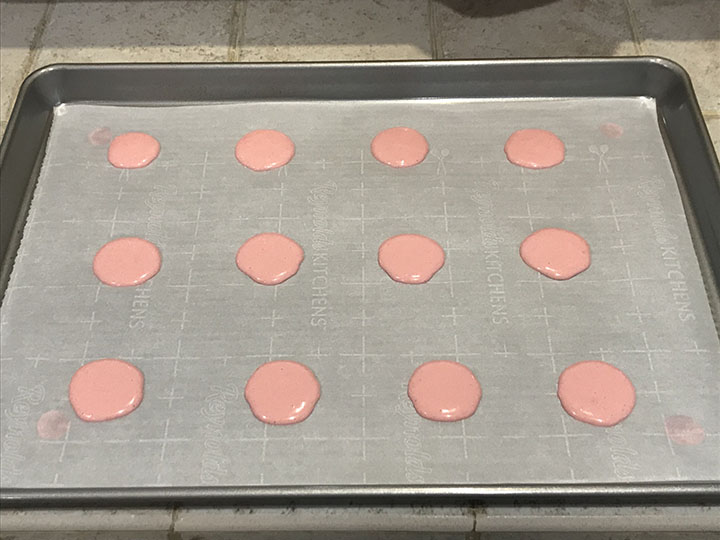
Pipe the macarons onto the baking sheet, leaving at least an inch in between.  I used parchment paper for this batch. You can see the small dots under each corner of the parchment paper that keep the paper from moving.

When you’re done piping, remember you MUST tap the baking sheet on the countertop to release air bubbles. I do about 5 taps on one side, turn tray clockwise, do 5 more taps, and so on, until I’ve tapped the baking sheet about 20 times. You may still have some little bubbles on the surface, you can just pop those with a toothpick.

Pink macarons on silpat

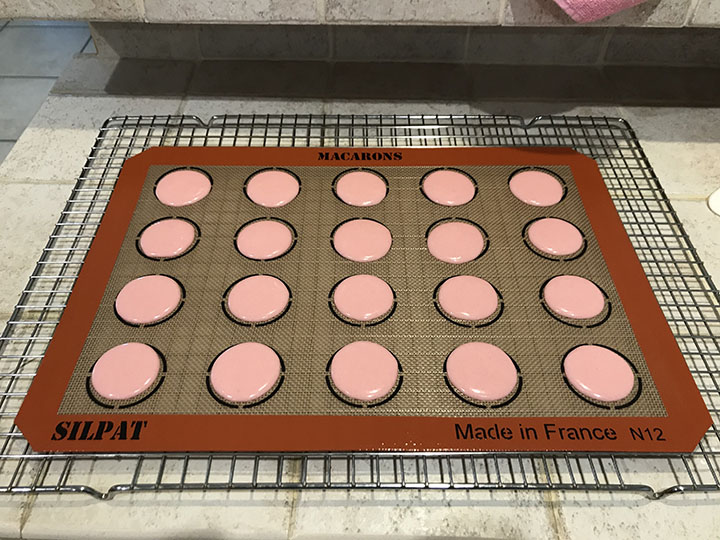
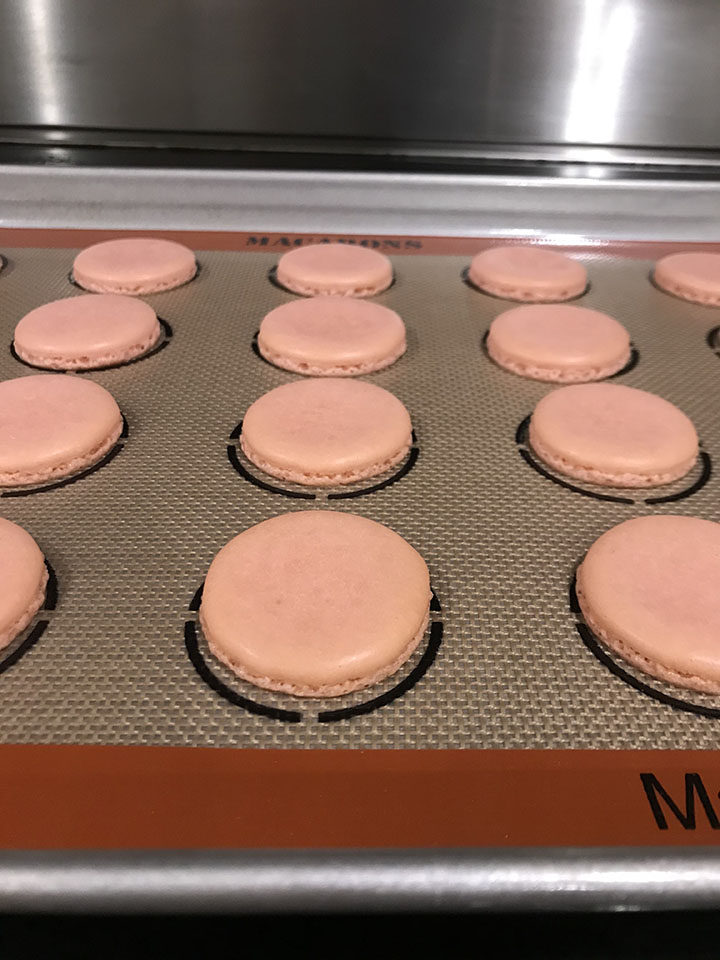
I also did a batch using a silpat mat. You can see the batter is a little more even on the mat because the silicone helps it from spreading too much.

Now, once you’ve piped the macarons, and before baking them, you MUST let them rest for about an hour.  This is key!  The top shell needs to dry. If you can touch the top of the shell and the batter doesn’t transfer to your finger, they’re ready to bake. This usually takes about an hour in my kitchen.

Baking macarons

You’ll want to bake these at 300F.  I would highly recommend using an oven thermometer for macarons. My oven is about 10 degrees off, which means when I set it to 300F, the internal temperature is actually 290F.  Not a great thing when you’re baking!

How long to bake macarons

I baked these for 17 minutes at 300F and they came out great!

Baked pink macaron shells on baking sheet

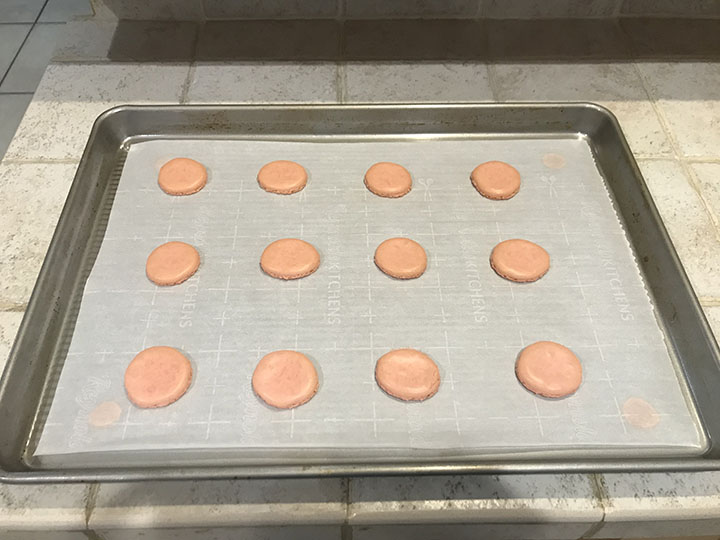
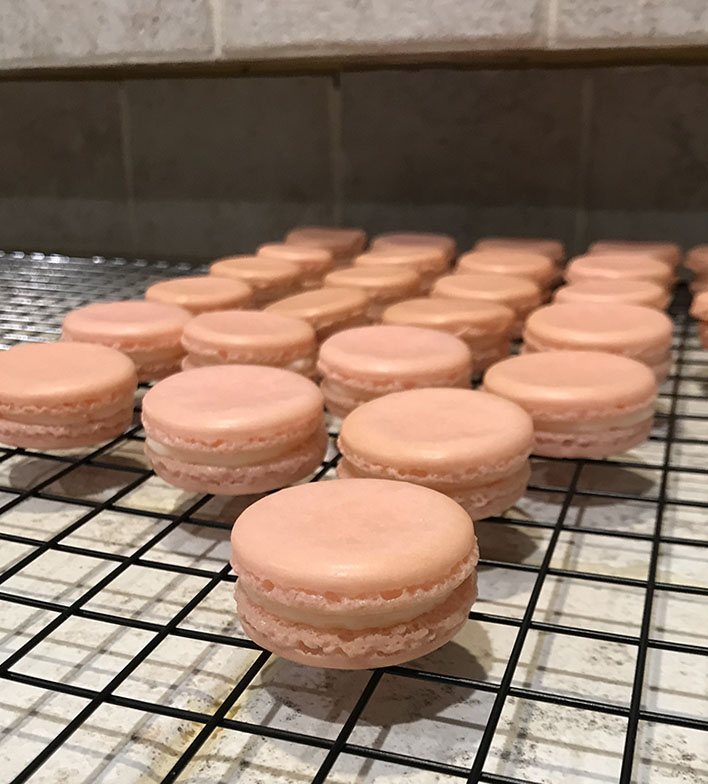
Here are the finished macaron shells baked on the parchment paper.

Pink macaron shells on rack

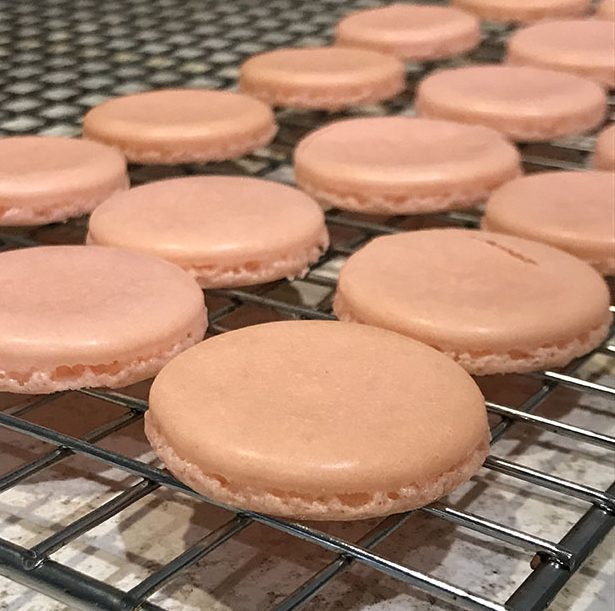
You can see the feet under the macarons here. Success!  However, I did crack one (you can see it above) when I removed it from the baking sheet. These cookies are delicate!

Pink macaron shells on silpat

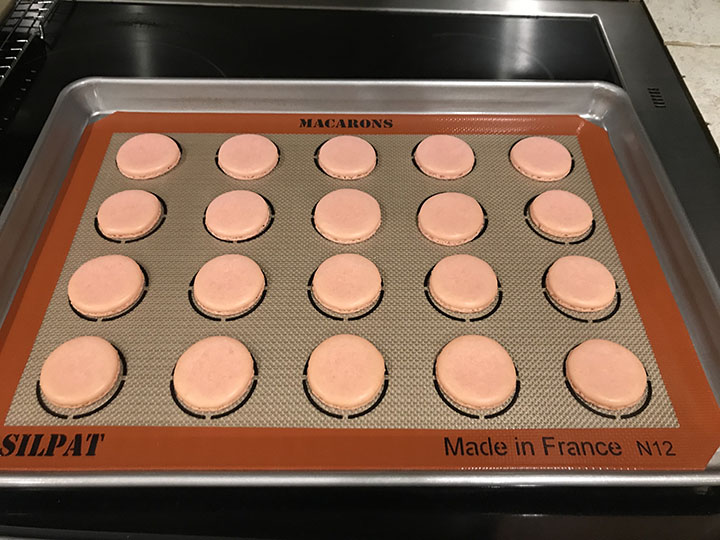
Here is the batch baked on the silpat. This was my first time using a silpat for macarons and I was very impressed at how evenly they baked. And they looked so pretty! However…..

Baked pink macaron shells on silpat

The bottoms of the macarons baked on the silpat were a bit sticky and kind of difficult to remove from the mat.  I had to be extra careful removing these.

Buttercream for macarons

Vanilla buttercream in glass bowl

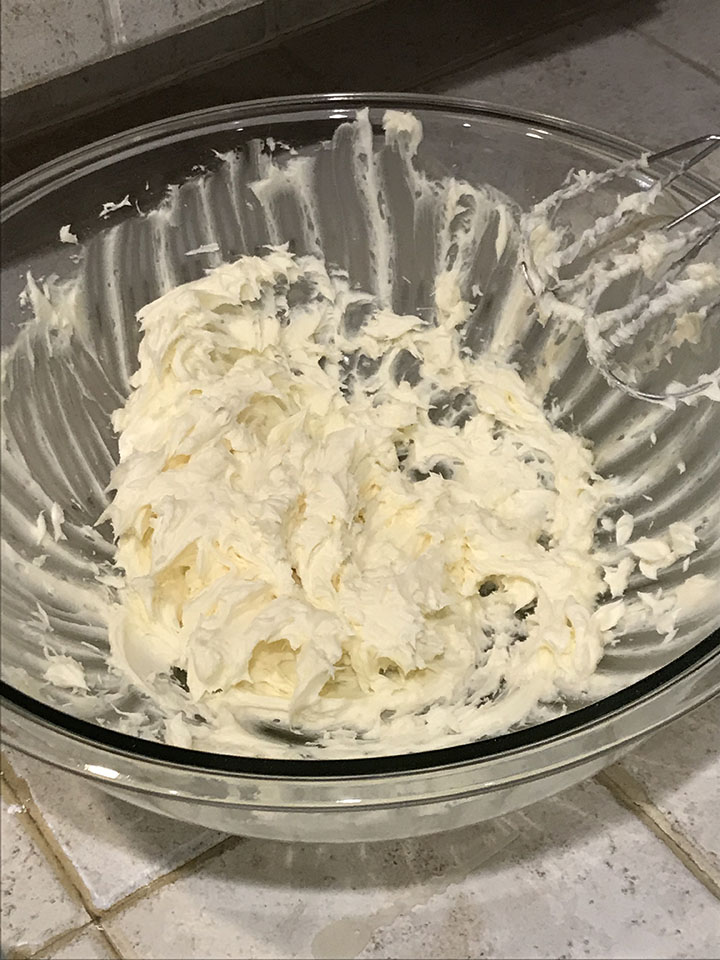
I like to fill my macarons with a classic vanilla buttercream. Butter, powdered sugar, and vanilla. So easy!  If you’re feeling adventurous, you can add a little flavoring to the buttercream, but I usually stick to classic vanilla.

Pink macarons on rack

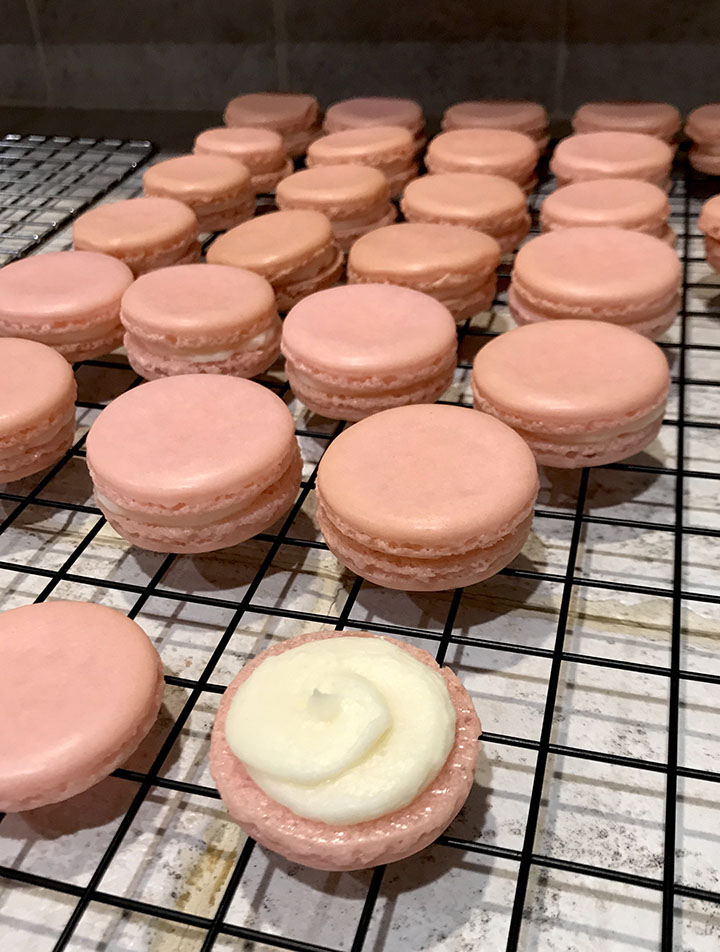
I fill my macarons with the buttercream starting at the center, and going around until I reach just inside the edge. Once you place the top shell, the buttercream will spread out a bit.

Pink macarons with buttercream on rack

And here are the filled macarons!

Macaroon or macaron

These cookies may have a similar name but they couldn’t be more different.  Macaroons are made with coconut flakes, have a chewy interior, and are baked until golden brown.  French macarons are made with almond flour and are a sandwich style cookie. They have a thin, delicate shell with a chewy interior and usually have a fruity or buttercream filling.

Macaron flavors

With this vanilla macaron recipe, there are endless possibilities of flavor combinations! Some of my favorites: Red velvet macaron with cream cheese filling, vanilla macaron with raspberry jelly filling, and my favorite, oreo macarons. This recipe really is the perfect starting point for any macaron.

Pink French Macarons tower

How long do macarons last

These macarons can last up to a week.  Because they keep so well, and actually taste better the next day, they’re a perfect make ahead dessert!

How to store macarons

I keep my macarons in an airtight container in my fridge. Macarons are best the day after, as they need time to mature in the fridge once filled. This is what makes them chewy.  Once you’re ready to eat, take them out of the fridge and let them come to room temperature.

Pink French Macarons tower

Vanilla Macaron Recipe

5 from 1 vote
This vanilla macaron recipe is so simple, you'll be able to make this delicious, yet notoriously difficult cookie in no time!
Print Recipe Pin Recipe
Prep Time 15 minutes mins
Cook Time 17 minutes mins
Resting time 1 hour hr
Total Time 1 hour hr 32 minutes mins
Servings: 36 macarons
Course: Dessert
Cuisine: French
Calories: 123
Ingredients Equipment Method

Ingredients
  

Macarons
  • 1 cup almond flour
  • 1¾ cups powdered sugar
  • ½ tsp salt
  • 3 egg whites (at room temperature)
  • ¼ cup granulated sugar
  • ½ tsp vanilla extract
  • 2 drops gel food coloring
Buttercream
  • 3 cups powdered sugar
  • 1 cup butter (at room temperature)
  • 1 tsp vanilla extract
  • 3 tbsp heavy cream (or milk)

Equipment

  • Stand mixer
  • Large mixing bowl
  • Spatula
  • Sifter
  • Food processor

Method
 

  1. Combine the almond flour and powdered sugar in food processor and process until extra fine.
  2. Sift the processed flour and sugar to get rid of any lumps.
  3. Using an electric mixer, whisk the egg whites and salt until soft peaks form.
  4. Add the granulated sugar slowly until fully combined and keep whisking until peaks start to form.
  5. Add vanilla and food coloring and continue to whisk until stiff peaks form.
  6. Add 1/3 of the flour and sugar mix to the egg whites and begin to fold the ingredients together. When all wet and dry ingredients have been fully combined, continue to fold until you can make a figure 8 with the spatula.
  7. Transfer the batter to a piping bag with a medium round tip.
  8. Pipe very small dot of batter in each corner of the baking sheet and place parchment paper on top. This will keep the paper from moving while you're piping the macarons.
  9. Pipe the macarons onto the parchment paper in 1 inch circles leaving 1 inch between macarons.
  10. Tap the sheet on the counter several time to get rid of air bubbles.
  11. Let macarons sit for at least an hour to dry.
  12. Preheat the oven to 300°F and bake the macarons for 17 minutes.
  13. Transfer the macarons to a wire rack and let sit for at least 30 minutes to cool.
Buttercream:
  1. Using an electric mixer, whisk the butter for about a minute until creamy.
  2. Add the powdered sugar and mix.
  3. Add vanilla and mix until fully combined.
  4. Add the cream one tablespoon at a time and continue mixing until smooth and creamy.
Pink macaron tower

Vanilla Macarons


Filed Under: Cookies, Desserts Tagged With: Macarons, Vanilla Macarons

Custard Bread Pudding

June 30, 2019 by Marilyn 1 Comment

Bread pudding with caramel sauce

This easy custard bread pudding recipe with a crispy brown sugar topping, covered in rich caramel sauce is the perfect dessert. Bread pudding is such a classic dish and this recipe with creamy custard and silky caramel sauce will not disappoint.

How to make custard bread pudding.

Cut the bread in 1 inch pieces and place them in the pan. Mix the heavy cream, eggs, white sugar, and vanilla extract to make the custard. Pour the custard over the bread and mix well. Refrigerate the mixture overnight.

Cubed bread in custard

The mixture that was left to soak overnight will look like it has absorbed most, but not all of the custard. With a slotted spoon, transfer the bread to the baking pan. Make sure all bread pieces are coated in the custard, but don’t pour the extra custard on the bread.

Bread pudding pieces in custard

This is how much mixture there was left over after transferring the bread to the baking pan.

Custard for bread pudding

Cover the top of the bread pudding with the brown sugar, making sure to spread it in a thin layer so that the sugar melts.  Bake the bread pudding for 45 minutes.

Bread pudding with brown sugar

When the bread pudding has about 20 minutes left, you can start making the caramel sauce. Melt the butter and add the brown sugar and bring to a boil. Then add the cream. This is what you should have once the cream has mixed with the sugar and butter.

Caramel sauce for bread pudding

When the bread pudding is finished baking, remove from the oven and let cool for about 10 minutes and then slowly pour the sauce over the top. This picture was taken right after I initially poured the sauce. The pudding will absorb some of the sauce. You’ll be left with about half of the caramel sauce which you can use to pour on the individual cut pieces.

Bread pudding with caramel sauce

This custard bread pudding was so simple and so delicious it’s become a staple at my house!

Bread pudding with caramel sauce

Custard Bread Pudding

5 from 1 vote
This easy custard bread pudding recipe with a crispy brown sugar topping and covered in rich caramel sauce is the perfect dessert!
Print Recipe Pin Recipe
Prep Time 10 minutes mins
Cook Time 45 minutes mins
Refrigeration time 1 day d
Servings: 18 servings
Course: Dessert
Cuisine: American
Calories: 412
Ingredients Equipment Method

Ingredients
  

  • 4 cups heavy cream
  • 12 eggs
  • 1 1/2 cups white sugar
  • 1 tbsp vanilla extract
  • 2 french baguettes (I used two medium sized baguettes)
  • 1/2 cup packed brown sugar
Sauce
  • 2 cups heavy cream
  • 1 cup butter (salted)
  • 2 cups packed brown sugar

Equipment

  • Medium sized bowl
  • Whisk
  • Two 9x13 inch pan (One to soak the bread overnight and one to bake)
  • Slotted spoon

Method
 

  1. Cut the baguettes into 1 inch pieces and place in the pan.
  2. In a medium bowl, whisk the cream, eggs, white sugar, and vanilla to make the custard.
  3. Pour the custard over the bread and stir the bread to make sure all pieces are covered.
  4. Cover the pan and soak bread overnight.
  5. When ready to bake, pre-heat the oven to 325°F.
  6. Remove the pan with the soaked bread from the refrigerator and gently stir the bread to make sure the bread is covered in the custard.
  7. With a slotted spoon, layer only the soaked bread into the pan, not the extra custard.
  8. Cover the top with brown sugar.
  9. Bake at 325° for 45 minutes.
To make the sauce
  1. In a medium pan, melt butter and add brown sugar.
  2. Bring to a boil.
  3. Add cream and stir until combined.
  4. When bread pudding is ready, let cool for about 10 minutes, and pour sauce over the top.
  5. There will be sauce left over which you can pour on the individual cut pieces.

Filed Under: Desserts Tagged With: bread pudding, Custard bread pudding, Desserts

Chocolate Chip Brownie Cookies

June 22, 2019 by Marilyn Leave a Comment

Chocolate Chip Brownie Cookies stacked in front of baking rack

This quick and simple recipe for semi-homemade chocolate chip brownie cookies blends the chewiness of brownies with a crispy cookie. Chewy on the inside, flaky on the outside. And so easy to make!

What are brownie cookies?

Brownie cookies are the perfect hybrid of a chewy brownie and slightly crispy cookie. You get the best part of the brownie, the chewy middle, with the slightly crispy outer shell of a cookie. The worst part of an over done cookie (at least for me) is the crumbly, crispy texture. You bite in hoping for chewy deliciousness, but it just breaks apart. Not these cookies! You get the best of both worlds, the chewiness and the slightly crispy shell.

How to make brownie cookies from a box.

I love a good cooking shortcut.  I don’t mind spending time in the kitchen but sometimes, I just want super easy dessert. These brownie cookies can be made with your favorite brownie mix, a bit of oil, two eggs, and whatever toppings you want to add. That’s it! I would recommend leaving out any liquid other than the oil, as the consistency would end up being too runny and the cookies would lose their shape.

Brownie cookie dough on cookie sheet

Brownie cookie dough with chocolate chips on cookie sheet

How long to bake brownie cookies?

My idea of the perfect cookie is one that’s chewy on the inside with just the right amount of crispiness on the outside. I don’t like a cookie that crumbles when I try to break it or bite into it. I bake these cookies for 9 minutes and the results are the perfect chewy on the inside, flaky on the outside cookie! I’ve also tried between 10 to 12 minutes, and they turned out too crispy for my liking.

Baked brownie cookies on cooling rack

How long can brownie cookies last?

These cookies have lasted up to a week in an airtight container without getting crispy or dried out.

If you love brownies and you love chewy cookies, I think you should make these asap!  I hope you enjoy!!

Brownie Cookies

Chocolate Chip Brownie Cookies

This quick and simple recipe for semi-homemade chocolate chip brownie cookies blends the chewiness of brownies with a crispy cookie. Chewy on the inside, flaky on the outside. And so easy to make!
Print Recipe Pin Recipe
Prep Time 10 minutes mins
Cook Time 9 minutes mins
Refrigeration time 1 hour hr
Total Time 1 hour hr 19 minutes mins
Servings: 24 cookies
Course: Dessert
Cuisine: American
Calories: 110
Ingredients Equipment Method Notes

Ingredients
  

  • 1 box favorite brownie mix (I used the family size, 18.4 oz)
  • 1/2 cup canola oil (or you can use vegetable oil)
  • 2 eggs (at room temperature) (to get eggs to room temperature quickly, fill a bowl with hot water and soak eggs for 5 minutes)
  • 1 cup chocolate chips

Equipment

  • Hand Mixer
  • Spatula
  • Medium Cookie Scoop
  • Cookie Sheet
  • Cooling Rack

Method
 

  1. In a medium sized bowl, using the hand-mixer, beat brownie mix, oil, and eggs for about 5 minutes.
  2. Stir in chocolate chips and fold with a spatula until chips are evenly distributed.
  3. Leave the dough in a bowl and refrigerate for an hour, minimum.
  4. When you're ready to bake, pre-heat the oven to 375°F.
  5. Lightly oil the cookie sheet with a few drops of the canola oil and spread evenly with a paper towel.
  6. Using a medium-sized cookie scoop, drop the dough about 2 inches apart, as the cookies will spread a bit.
  7. Bake for 9 minutes.

Notes

  • I always refrigerate my cookie dough since it helps the cookies retain their shape, and keeps them from spreading and flattening.
  • I bake these cookies for 9 minutes exactly and they come out soft and chewy without getting crispy. I've also baked them for 10 minutes and they came out slightly crispier on the edges.

Tower of chocolate chip brownie cookies


Filed Under: Cookies Tagged With: Chocolate Chip Brownie Cookies, Cookies, Desserts

Primary Sidebar

welcome!

Hi and welcome to The Crispy Cook! Here I share easy baking recipes, including tips and tricks I've learned along the way.

Thanks for visiting and I hope you enjoy!

Categories

  • Cookies
  • Desserts

Copyright © 2025 The Crispy Cook on the Foodie Pro Theme